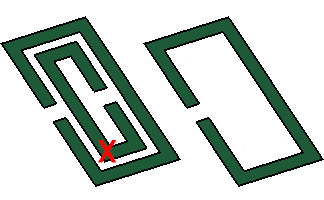
The  Remove Holes modeling option closes gaps in a sheet body, but not a solid. It is particularly useful for editing the target part of a wrap sheet operation since the target part cannot have holes for a successful wrap.
Remove a hole within a Sheet Body by following these steps:
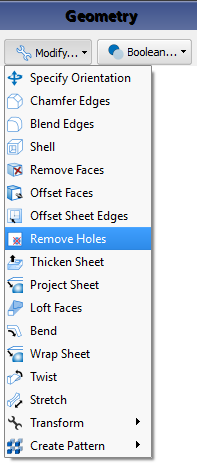
- Click Modify at the top of the Geometry window.
- Select Remove Holes from the menu.
- While working in the Select Model tab, click on the part in either the Project Tree or Geometry window.
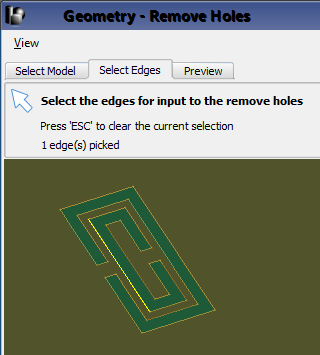
- Once the model is selected, click the Select Edges tab.
- In the Geometry window, select an edge of the hole that should be removed.
- Click the Preview tab and ensure the hole is removed as expected.
- Click Done to apply the changes and close the editor.
- Ctrl+: selects multiple edges individually.
- Esc: clears selected edges.
The Remove Holes function can also be accessed by right-clicking on the part in the Project Tree and selecting Modify. Clicking in the Project Tree identifies that part as the input model and eliminates the need for the Select Model tab. The Select Edges tab opens automatically and the Remove Holes editor can be used as described above.