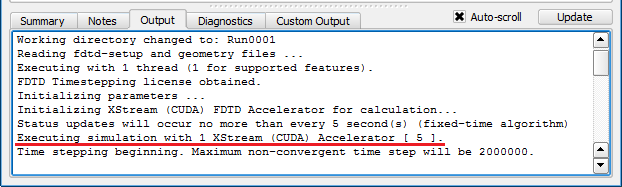
XF's calculation engine, XFsolver, utilizes a NVIDIA graphics processing unit (GPU) when the GPU is properly installed, the drivers are up to date, and the number of GPUs was specified when the simulation was created. The Output tab in the Simulations window confirms the utilization of GPUs.
If the GPU does not initialize, confirm that the NVIDIA CUDA-capable card is properly installed.
- Insert the NVIDIA CUDA-capable card firmly into the motherboard.
- Check for a proper connection between the card and the machine's power supply unit.
This process will vary depending on the type of card. The exact methods for connecting a CUDA-capable card to the motherboard are beyond the scope of these instructions, so users should refer to the documentation provided with the card.
After ensuring a proper installation, proceed to the Specify the GPU(s) and Check Driver and Update sections below.
Specify the GPU(s)
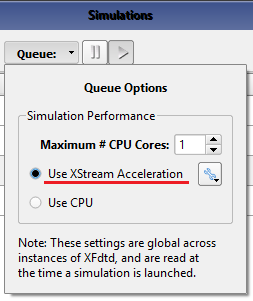
XFsolver does not automatically search for and run on GPUs. It requires instruction on how many GPUs to utilize. When running a simulation through the user interface, select the Use XStream Acceleration option in the Simulations window. When running through the command line, provide the --use-xstream and --xstream-use-number options, similar to those shown below.
[remcom@cluster 000001]$ xfsolver --verbose --use-xstream=true --use-cpu=false --xstream-use-number=1 --num-threads=1
Additional command line options are available for utilizing GPUs. Refer to xfsolver --help
Check Driver and Update
The GPU driver must be up to date in order for XFsolver to utilize it in a simulation, so users should check the driver version before updating the driver. XF does not rely on the CUDA Toolkit to interact with GPUs. Developers utilize the CUDA Toolkit along with CUDA SDK when designing CUDA-capable software, so the toolkit is not needed by end users of that software.
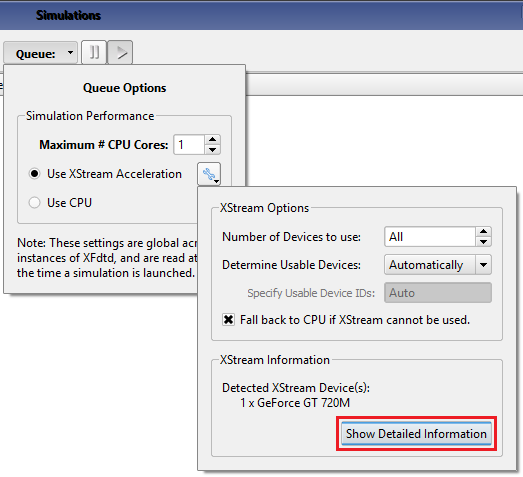
Users can identify the GPU driver version within the user interface by clicking the Show Detailed Information in the Simulations window.
Alternatively, users can enter the following command line:
$ xfsolver --xstream-list-devices
The message's content includes two CUDA version numbers, similar to the following example:
CUDA runtime version: 4010
CUDA driver version: 4020
If the driver version is less than the runtime version, then users should update the driver by following these steps:
- Download the card's newest driver from the NVIDIA website and save it to the disk.
- Install the driver by following the prompts in the installation wizard.
Once the driver update is installed, users should confirm that the driver version is greater than or equal to the runtime version by repeating the previous steps. For a driver version that is less than the runtime version, users should ensure that the manufacturer's latest available GPU driver is installed. In cases involving a persistent error message that occurs when initializing a simulation, users should refer to XFsolver's error message under the Output tab for troubleshooting clues, or contact Remcom support for further assistance.