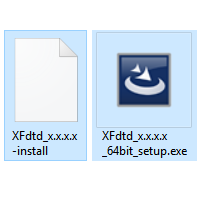
The XF software product requires installation on a desktop, laptop, or other machine before use. Its installation files are available via web download, and the process includes both the application and its supporting files.
Install on Windows
Run the installation file once the installer is downloaded:
- Log on to the machine as an administrator.
- Double-click on XFdtd_7.x.x.x_setup.exe
- Follow the on-screen prompts to complete XF installation.
When finished, open XF through the Windows Start menu ❯ Remcom ❯ XFdtd 7.x.x.
Users can then proceed to XF's licensing instructions for demo, node-locked, USB key, or floating configurations.
Users can perform a silent install by utilizing the /S /v"/qn" switches when calling the installer. For example, C:\Installers\XFdtd_7.x.x.x_setup.exe /S /v"/qn"
Install on Linux
Begin the installation process once the installer is downloaded:
- Log on as a user with appropriate write permissions for the desired destination directory.
- Install the following dependencies for your operating system using a package manager such as YUM, APT, or DNF.
- RHEL and CentOS 7: redhat-lsb-core mesa-libGLU zlib-devel
- RHEL and Rocky Linux 8: zlib-devel mesa-libGLU xcb-util-wm xcb-util-image xcb-util-keysyms xcb-util-renderutil libnsl zlib-devel
- RHEL and Rocky Linux 9: lsb_release mesa-libGLU libicu60 pcre2-utf16 xcb-util-wm xcb-util-image xcb-util-keysyms xcb-util-renderutil libnsl zlib-devel
- Ubuntu 18: lsb-core libxcb-xinerama0 libxcb-xinput0 zlib1g-dev
- Ubuntu 20 and 22: libxcb-xinerama0 libxcb-xinput0 zlib1g-dev
- Ubuntu 20 and later: libicu60 from https://launchpadlibrarian.net/361669149/libicu60_60.2-3ubuntu3_amd64.deb
- Ensure that the XFdtd_7.x.x.x-install and XFdtd_7.x.x.x-installer-data files are in the same directory.
- Run the installation file XFdtd 7.x.x.x-install from a command line with the name of the target installation directory, which must be writable. For example, the command ./XFdtd_7.x.x.x-install /usr/local installs XF in the /usr/local/remcom directory.
As part of the installation process, users are required to view and agree to the license agreement. While viewing it, press the space bar to page through and Q to close and continue.
The installation directory, for example, /usr/local/remcom, contains bin, FLEXlm, licenses, and XFdtd_7.x.x.x subdirectories. The FLEXlm directory is needed only when running a floating license server. The licenses directory is the recommended location for license files provided by Remcom. All application files reside in XFdtd 7.x.x.x, but users should not access them directly.
XF and XFsolver are invoked using the launch scripts xfdtd and xfsolver, respectively, that reside in the remcom/bin directory. They are called directly by either using a full path, for example, /usr/local/remcom/bin/xfdtd, or including them in the user's PATH, for example, setenv PATH /usr/local/remcom/bin:$PATH). The launch scripts determine the platform and version of the appropriate XF command to execute.
Users can then proceed to XF's licensing instructions for demo, node-locked, USB key, or floating configurations.
