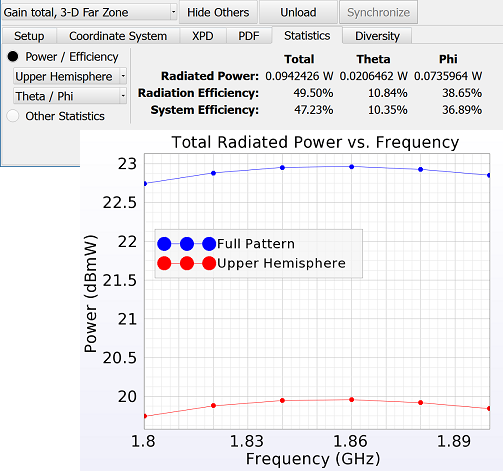
The Plot Far Zone Statistics macro allows users to plot the data displayed in the statistics tab of the far zone visualization controls. This enables convenient analysis of the results when multiple steady-state frequencies are specified.
Results are either added to an existing graph or used to create a new one. This macro allows users to save presets for use across multiple far zone pattern analyses in order to create plots and quickly generate data.
This script iterates over each available run and creates a plot for each unique data set. A run is skipped if issues prevent access to its required data sets.
Prerequisites
In order for the script to function properly, users must follow the standard project setup workflow for antenna analysis. The following steps must also be completed:
Workflow
Use the macro by following these steps:
- Download Plot Far Zone Statistics.xmacro
- Place the file in your Macros Menu directory or right-click on Scripts in the Project Tree and choose Import Scripts.
Once the script is available, select a result.
- Open the Results browser.
- In the lower portion of the Results browser, select a single far zone result.
- Execute the script by selecting it in the Macros Menu, or right-clicking on the imported script in the Scripts branch of the Project Tree and choose Execute.
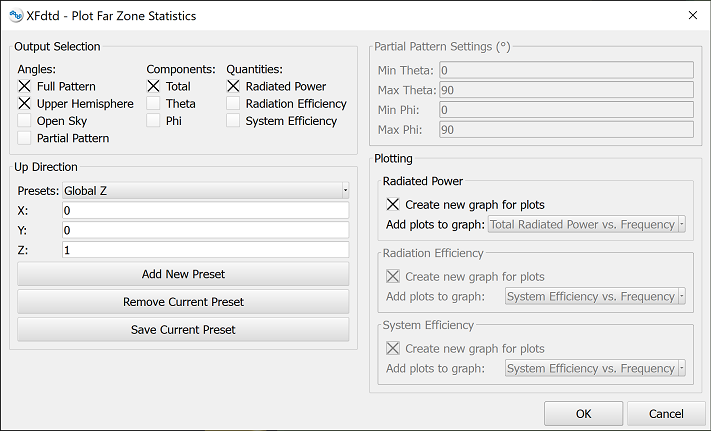
Once the script is executed, a window opens where far zone statistics are specified for plotting.

- In the Output Selection section, select one or more item from the Angles group.
- In the Output Selection section, select one or more item from the Components group.
- In the Output Selection section, select one or more item from the Quantities group.
The items checked in the Output Selection section determine which of the remaining groups are enabled.
In the Angles group, checking either Upper Hemisphere, Open Sky, or Partial Pattern enables the Up Direction section where users can indicate which direction is considered up. This is necessary when the antenna's orientation in x, y, z coordinates does not match its physical orientation while operating, such as next to a human head. Users can create presets for reuse in subsequent analyses.
- If the Up Direction section is enabled, enter X, Y, and Z values to specify the up direction vector.
Checking Partial Pattern also enables the Partial Pattern Settings section where users can define a solid angle to compute data.
- If the Partial Pattern Settings section is enabled, specify both the theta and the phi ranges.
In the Quantities group, checking either Radiated Power, Radiation Efficiency, or System Efficiency enables that option's corresponding settings in the Plotting section. Each quantity is plotted on an XY graph. For each enabled data type, either create a new graph or add each plot to an existing graph by selecting from the drop-down menu.
- For each enabled plot type, either create a new graph or specify the desired output location.
- Click OK to close the editor and plot the data.

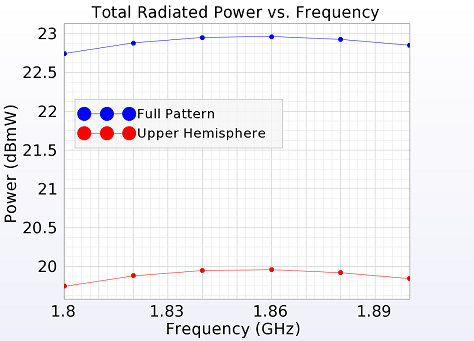
The script loads the data specified in the dialog and generates the associated graphs. Output graphs are available in the graphs node of the project tree.
Users should note that the generated data is static and does not update to reflect changes if the script is rerun.


