Libraries are reusable collections of objects and definitions that facilitate efficient project creation. Each library links to a directory on a local or shared disk. Objects and definitions added to a library are saved to their own subdirectory rather than to a specific project, making them available for use in subsequent projects. This allows users to import library contents into a project and avoid rebuilding frequently-used objects and definitions each time they are needed.
Controls
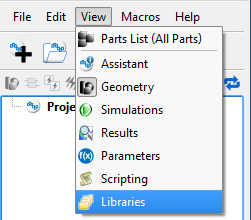
Users can access the Libraries window by clicking the Libraries button on the right side of XF, or by selecting View ❯ Libraries in the upper-left corner.
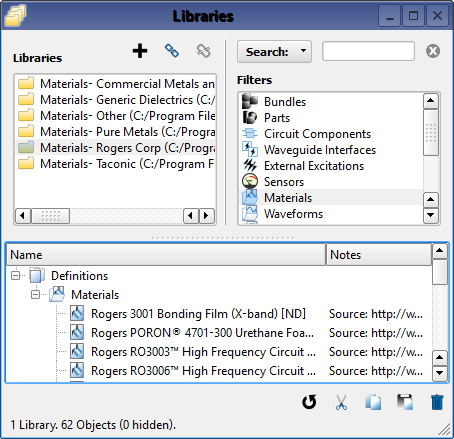
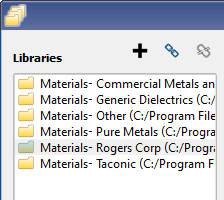
The Libraries window is separated into three panes that list XF's libraries, filter the selected library by category, and display that library's filtered contents. The Libraries pane in the upper-left portion of the window lists all XF library files. Libraries are not project-specific and each one added to XF remains listed and available for use unless intentionally removed.
The three buttons at the top of the pane control the listed libraries:
- The
 button creates a new library directory, and allows users to name the library and specify where the local file is stored.
 - The
 button loads an existing library into XF. Users can browse to a local file and add it to the Libraries list.
 - The
 button removes a library from the Libraries list. The local file still exists but is no longer linked to XF's Libraries window.
Users can select one or more libraries from the list, and then use the Filters pane in the upper-right portion of the window to narrow library contents by category. The listed filters remain the same regardless of a library's content.
The third pane spans the lower portion of the window and displays the objects and definitions associated with each selected library and filter.
Five buttons at the bottom of the window edit the library contents in the lower pane:
- The
 button refreshes the the window to display any changes.
 - The
 button cuts selected objects and definitions, removing them from view.
 - The
 button copies selected objects and definitions to the clipboard without removing them from their original location. This allows users to copy an object from a library and paste it into the project tree.
 - The
 button adds objects and definitions from the clipboard to a new location. This allows users to copy an object from the project tree and paste it into a library.
 - The
 button deletes selected objects and definitions from a library.
Users can also perform these actions through the right-click menu of a selected object or definition.
Add a Library
Each library listed in the Libraries window points XF to a locally-saved directory. This window allows users to add libraries to XF by either creating a local directory or loading an existing library.
Users can create a new library by clicking the button in the upper-left portion of the window to open the Create a new Object Library directory window. Here, a library is created once the named file is saved to the specified location by clicking Save. The new file appears immediately in XF's listed Libraries and is available for added content.
Users can access an existing library by clicking the button to open the Load Object Library window. Navigating to the directory's location, selecting the desired library, and clicking Select Folder adds the directory to XF's available libraries.
Add and Use Library Contents
Users can add to a selected library by clicking on the desired object or definition in the project tree and dragging it to the lower portion of the Libraries window. The added content is visible in the window when its associated category is selected in the Filters pane.
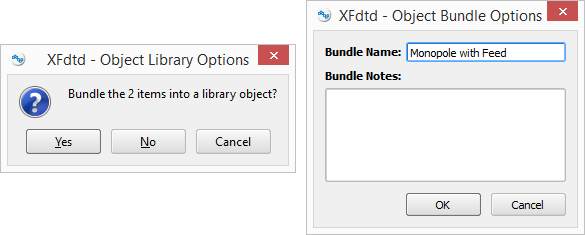
Users can create a bundle in the Libraries window by selecting the desired objects and definitions in the project tree while pressing the Ctrl key, and dragging them to the lower portion of the window. An Object Library Options dialogue prompts users to confirm the number of items to bundle into one object. Clicking Yes opens a second dialogue that allows users to name the bundle and attach an optional user-defined note, and then click OK to add the bundle to the library. The bundle is visible in the window when viewing the library contents with the Bundle filter selected.
Users can import library contents into a project by clicking on the desired object or definition in the lower portion of the Libraries window and dragging it to the appropriate branch of the project tree.